Real Life RGB Glowstone
We’ve been experimenting with the Raspberry Pi and LearnToMod to create some pretty awesome mods. If you haven’t heard of the Raspberry Pi yet, it’s a $35 microcomputer that is about the size of a credit card! Not only is it fast enough to run a LearnToMod Minecraft server, it allows us to control things in the real world.
Using the Raspberry Pi’s GPIO (General Purpose Input/Output) pins, we can integrate anything from LED’s (Light Emitting Diodes), buttons, and motors, to bigger things like cameras, robots, and automatic cat feeding machines!
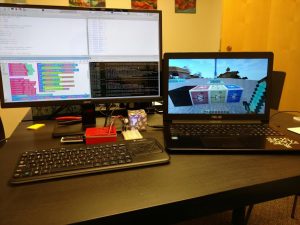
LEFT: Raspberry Pi LTM Server, RIGHT: Remotely connected laptop running Minecraft 1.8.9
Of course, it’s always a good idea to start small. So here’s a project we made that controls an RGB LED by hitting different colored wool. Hitting a color once turns that color on. Hitting it again will turn that color off. This let’s us mix and match to create a total of seven different colors (red, green, blue, yellow, cyan, magenta, and white).
https://youtube.com/watch?v=0uUOKnCfnvQ
Want to try this yourself?
- Setup a Raspberry Pi with the default Raspian OS and connect it to WiFi or LAN.
- Launch the browser on the Raspberry Pi and download the Offline LearnToMod Server
- Follow the instructions from the link to set up the server on a raspberry pi.
- Ignore the steps to join the server. We’ll join the server remotely from another computer.
- Follow the directions from the link to copy your LearnToMod mods to the spigot server.
- Copy the JavaScript from my RGB Lamp Mod
- You must be logged in with a LearnToMod account
- This mod will create a beacon that will match the color of the RGB LED and apply custom textures to the wool blocks.
- Copy the JavaScript from my RGB Lamp Mod
- Follow the instructions from the link to set up the server on a raspberry pi.
- Install the RaspberryJuice 1.7 Plugin
- Download this file and place it in the plugins folder of the learntomod server.
- Assemble an RGB LED Circuit
- Use 220 Ohm or 330 Ohm resistors on each color of an RGB LED (common cathode).
- Connect the common cathode to GND (Pin 6) on the Raspberry Pi’s GPIO.
- Connect the resistor end of each color signal to these pins:
- Red = Pin 11
- Green = Pin 12
- Blue = Pin 13
- Download my minecraft_rgb Python script to control the RGB LED
- Place it in a folder on your desktop.
- This script will create 4 wool blocks and check for block hits (right-click with a sword).
- Each block hit will toggle the red, green, and blue pins respectively
- The black wool block will turn off all pins.
- On a separate computer launch Minecraft running version 1.8.9 (not Minecraft Pi Edition)
- Go to Multiplayer and then Direct Connect
- Type your raspberry pi’s ip address followed by “:25571”
- To find out the ip address: Open a terminal on the Raspberry Pi and type:
- hostname –I
- To find out the ip address: Open a terminal on the Raspberry Pi and type:
- Click Join Server
- Run your mods!
- Open your mod chest and grab the rgb_lamp mod.
- Find a nice open spot and run the mod to create a beacon
- Find a new open spot next to the beacon and then switch over to the Raspberry Pi
- Open IDLE3 and run the Python script
- This will create the in-game “buttons”
- Go back to your remote computer and equip your new diamond sword.
- Right-click on each block to toggle different colors.
 Jason Le, ThoughtSTEM Teacher & Curriculum Developer –
As a graduate of Cal State Long Beach with a bachelor’s degree in Computer Engineering and a minor in Computer Science, Jason has worked on projects ranging from software applications to scratch built autonomous vehicles. His love for technology is equally matched by his passion for mentoring. He has designed, developed, and taught K-12 technology curriculum for various summer tech camps as well as in-school electives and after school programs.